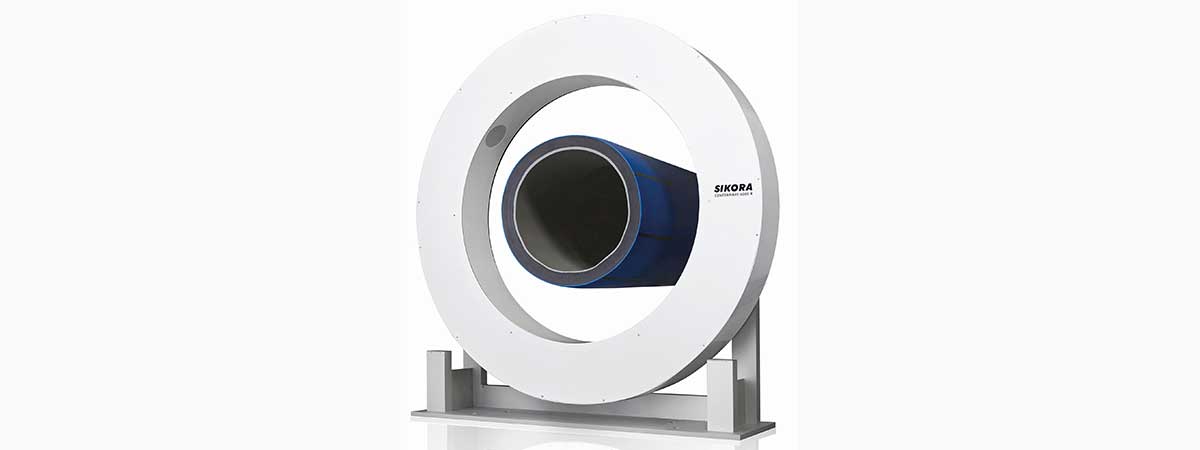
SIKORA at Fakuma 2017
At Fakuma in Friedrichshafen, SIKORA is following seamlessly on from its earlier performances at renowned trade fairs for plastics, such as K in Düsseldorf and Chinaplas in Shanghai. Innovative measuring, control, inspection, analysis and sorting devices for the hose, tube, sheet and plastics industries will be presented. In the extrusion area, the focus will be on the CENTERWAVE 6000 for the measurement of large plastic tubes and the PLANOWAVE 6000 for the thickness measurement of plastic sheets. Further highlights are the PURITY SCANNER ADVANCED for the online inspection and sorting of plastic pellets as well as the PURITY CONCEPT systems for the offline inspection and analysis of pellets, flakes and films/tapes.
CENTERWAVE 6000: Measurement of large pipes with millimeter waves technology
With the CENTERWAVE 6000, SIKORA presents a main actor for the measurement of diameter, ovality, wall thickness and sagging of large plastic pipes during the extrusion. The system is based on millimeter waves technology and measures pipes from 90 to 3,200 mm. The CENTERWAVE 6000 R is available in a rotating version and thus offers the complete recording of the wall thickness at 360 points of the entire circumference of the pipe. Alternatively, a multiaxial system is available with static sensors. Both systems measure completely contact-free, they do not require any coupling media nor calibration and are independent of the material and temperature of the pipe. “Already one year after its market introduction, the CENTERWAVE 6000 is successfully in use in production lines”, declares Holger Lieder, Sales Director SIKORA AG. “The benefits are obvious: continuous, reliable and precise measurements over the entire circumference of the pipe. The technology delivers information for the centering of the extrusion tools and the thermal control of the line. Simultaneously, the minimal wall thickness is ensured – and this saves costs. Modern quality assurance cannot be more perfect”, says Holger Lieder.
PLANOWAVE 6000: Second member of the millimeter waves family for sheet extrusion
The PLANOWAVE 6000, like the CENTERWAVE 6000, is based on millimeter waves technology with the resulting technical benefits. The PLANOWAVE 6000 precisely measures the thickness of plastic sheets continuously during extrusion and over the entire width. “The PLANOWAVE excels through highly precise and non-contact measurements of the sheet thickness during the running extrusion and delivers measuring values for the adjustment of the crosshead”, says Holger Lieder.
PURITY SCANNER ADVANCED: Online inspection and sorting of plastic pellets with a flexible camera concept
Another highlight at Fakuma is the PURITY SCANNER ADVANCED for online inspection, and sorting of plastic material. The unique combination of an X-ray camera with a flexible, optical camera system is the only technology at present that reliably detects contamination on the surface as well as inside of plastic pellets. Contaminated pellets are automatically sorted out. The user decides with which camera configuration the PURITY SCANNER ADVANCED will be delivered. Depending on the type of contamination and application, optical high-speed cameras as well as X-ray, color and infrared cameras are coming into use. “In conversations with customers we observe that not only inspection but also data control and recording are becoming increasingly important. After all, it is this information that is finally leading to optimized processes and end products of the highest quality”, explains Holger Lieder.
Offline inspection and analysis of pellets, flakes and films/tapes with the PURITY CONCEPT systems
For smaller material throughputs and for applications where sampling analysis or incoming goods inspection are sufficient, SIKORA’s engineers developed the PURITY CONCEPT Systems. Alternatively, these analysis devices can be equipped with X-ray technology, optical cameras or infrared sensors and detect contamination in pellets, flakes, films/tapes and crosshead parts. The PURITY CONCEPT Systems are used, for example, for analyzing pellets, which were detected and sorted out by the PURITY SCANNER. “The interaction of online and offline inspection and analysis allows a complete control of the cleanliness of the material and the setup of a database in order to further improve processes and to avoid future contamination”, explains Holger Lieder.
Comprehensive portfolio for measuring devices for hose and tube extrusion
For hose and tube extrusion lines, SIKORA’s product spectrum ranges from devices for innovative diameter measurement with the LASER Series 2000 and 6000 to lump detectors for the detection of irregularities on the product surface and further to the X-ray measuring systems of the X-RAY 6000 series. Due to the precise measurement of the inner and outer diameter, the wall thickness of up to 3 layers, the eccentricity as well as the ovality of products, the systems ensure manufacturers the highest quality as well as cost savings and profitability during extrusion.
