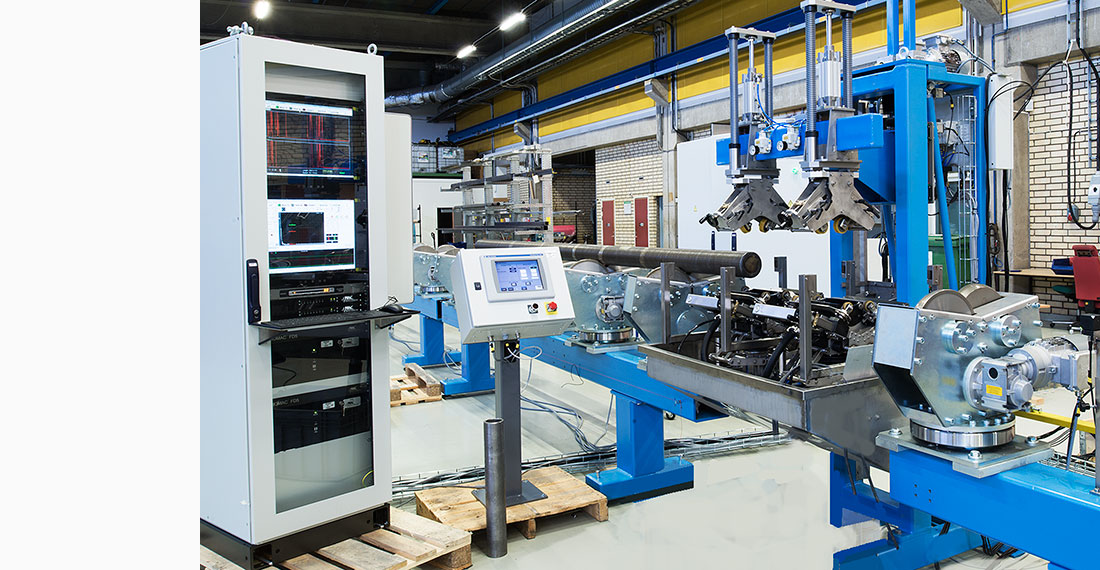
Full Body Ultrasonic Inspection of Spinning Tube
Magnetic Analysis Corp. (MAC) has developed an Ultrasonic Spin-The-Tube inspection system utilizing MAC’s Automated Pitch Control (APC) Technology, and a premium grade conveyor designed specifically for testing applications. Capable of handling a larger range of diameters and material that is not as straight as usually required by other test systems, the APC design is a significant new option for this application
At the heart of MAC’s full body and tube end tester systems is the unique APC transducer carrier which adjusts to the actual pitch as the tube is rotated during the test. The APC carrier with its simple immersion water tray follows unstraight tube and reliably maintains constant coupling and water path. The spinning tube moves longitudinally past the transducers and the APC’s follower rolls, which ride under the surface of the tube, automatically adapt to the angle of the helical pitch produced by the tube’s rotational speed and forward motion. This design ensures minimal wear and permits testing of materials with ovality and straightness problems.
Material Handling is a critical aspect of any Spin-The Tube inspection system and MAC has manufactured a premium grade conveyor to compliment the APC Test Heads. This conveyor is engineered from an NDT perspective and ensures efficient material handling and containment. The Powered Roller Heads are robustly designed and accurately maintain the inspection helix and rotational speed to assure there are no untested areas within the Scan Plan.
A recent system was installed and commissioned at a major producer of Seamless and DOM Tubular Products. The machine was designed for Longitudinal, Transverse, Wall Thickness and Lamination Detection to the 5% and 10% level. This particular application required two Test Heads and 30 transducer elements, however, the specific layout and scan plan can be easily modified depending on the customer’s test specifications. The transducer elements can move to either end of the water tray to allow for testing to the very end of the tube, minimizing untested ends. The test head is lifted into the test position beneath the tube by an air cylinder when the leading end of the tube has passed, and lowered when the trailing end approaches. This ensures the head is securely positioned when the tube ends pass, preventing possible damage during normal operation. All mechanical components are manufactured from stainless steel to prevent corrosion and premature wear.
The system’s design allows the tube producer to test a broad range of tube diameters from 50mm to 355mm (2” – 14”) diameter, without changing bushings or glands. A simple one-knob adjustment control and convenient diameter scale are used for changes in dimension, ensuring the UT sound entry point and incident angles remain constant for any tube size.
